CPFnF:Editor
From EQUIS Lab Wiki
Contents |
Objectives
The goal of the editor is to be able to create and modify levels using Meerkat, at run-time. It will be possible to modify a level while somebody plays in it.
The editor can be run on a mouse-keyboard computer or on a touch-screen. Using a large multiple points touch-screen also permits multi-user behavior, so several people can create a level collaboratively and synchronously.
Configuration
Tools
- Microsoft Visual Studio 2010 Professional
- XNA 4.0
- Meerkat
- Neoforce controls GUI
- Pie menus
Toolkits
- Windows7.Multitouch .NET interop library:
 - http://archive.msdn.microsoft.com/WindowsTouch
 - Easy to add to a XNA project (add project to solution)
- PQLabs Multi-touch: you can access the installation tutorial of the PQLabs tabletop there.
Resources
- Windows Touch Programming Guide:
 - http://msdn.microsoft.com/en-us/library/dd317323(v=vs.85).aspx
 - Provides documentation about the different gestures and how to enable/disable some of them (GESTURE_CONFIG)
Neoforce GUI Skins
- The GUI will not work if the skins are absent, so it’s necessary to directly add the Skins folder into your project.
- The skins file is present in the repository project at the right place, if not:
 - A copy of the folder is present in the repository at svn://equis.cs.queensu.ca:36363/CP Fit n Fun docs/Resources/Editor Resources
 - Copy this folder directly in your content project. For example for MeerkatEditor, copy the Skins folder into MeerkatEditor/bin/x86/Debug/Content/
 - It’s necessary to do so because the compiler doesn’t know what to do with skin files…
User's Guide
Finding Meerkat Level Editor
Don't worry, you can easily find Meerkat Level Editor's project in the subversion repository at this address: svn://equis.cs.queensu.ca:36363/Cp Fit n Fun/
Overview
Here, I will present the basic screen that the user sees using the editor.
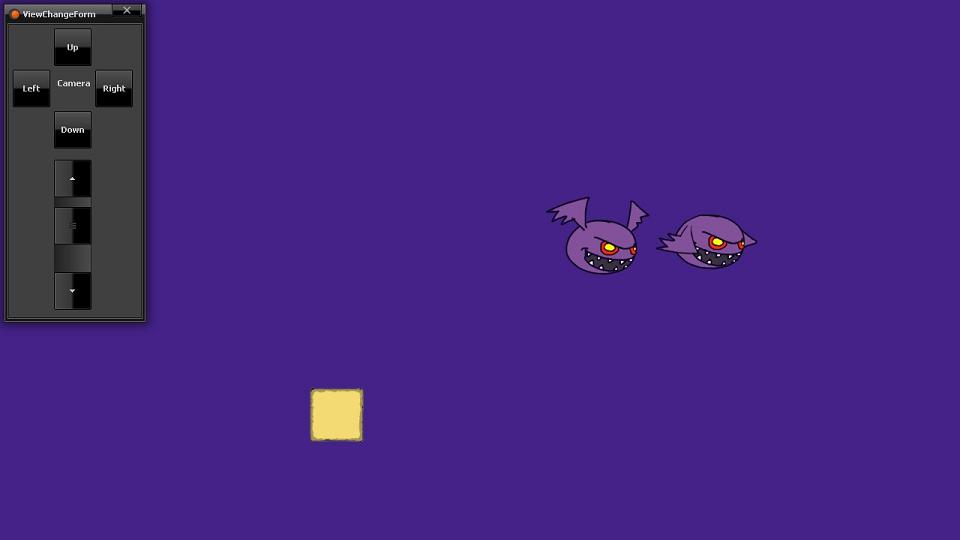
On the top left corner, you can see the ViewChangeForm. It basically allows the users to move and zoom in/out the Camera. There is only one such form independently of the number of users, as we realized that moving the camera will only be made after a decision taken between all of the users.
This form is there to provide the capabilities of moving/zooming the camera when the scene is flooded with entities, and there's no way the user could move an empty space.
On this screen you can see an entity made of two bats, in different positions. It basically is an animated texture, we will see further how we can animate it.
Interactions present different interfaces according to what input is used, the following code will be used to precise what input allows the concerned interaction:
- S for the slate PC
- PQ for the PQLabs tabletop
- M for mouse
- MK for mouse with keyboard
For example, "S+PQ: interaction" means that interaction can be performed on a slate PC and on the PQLabs tabletop, but not with the mouse, and mouse and keyboard.
Moving an entity
Moving an entity can be done with:
- S+PQ: Finger pan: maintain finger on the entity and move it around
- M: Mouse drag: press left button on an entity and drag it around
Resizing an entity
Resizing an entity can be done with:
- S+PQ: Two-finger pinch
- M: Mouse wheel
Rotating an entity
Rotating an entity can be done with:
- S+PQ: Two-finger rotation
- MK: Shift + mouse drag
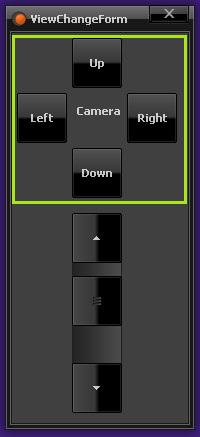
Moving camera
Moving the camera of the scene can be done with:
- PQ: four+ fingers pan
- S+PQ+M: "D Pad" controls in ViewChangeForm
- MK: Alt + mouse drag
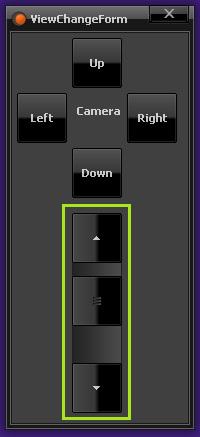
Zooming camera
Zooming the camera of the scene can be done with:
- S+PQ+M: Vertical slider in ViewChangeForm
- MK: Alt + mouse wheel
Adding an entity
Adding an entity is done through pie menus.
Creating a pie menu can be done with:
- PQ: double tap
- S: Two-finger tap
- M: Right click

You then select what texture you want for the new entity. Pie menus provide a hierarchical categorization whenever the EditorContent/Textures folder is hierarchically categorized with folders/subfolders/texture files (png/jpg).
The pie menus also provide a history of recently added entities in their first page.
It is also possible to change the amount of items per page in pie menus by changing ItemsPerPage in EditorPieMenu.cs (the default value is the recommended number of items in a pie menu: 8).
Modifying an entity
You can modify every entity in every way that makes sense.
This can be done in the PropertiesModificationForm of the entity. To invoke such form, there are two ways:
- S+PQ: Fingers press and tap: keep one finger pressed on the entity, and tap on the entity with a second finger
- M: Mouse middle click
- MK: Ctrl + left-click
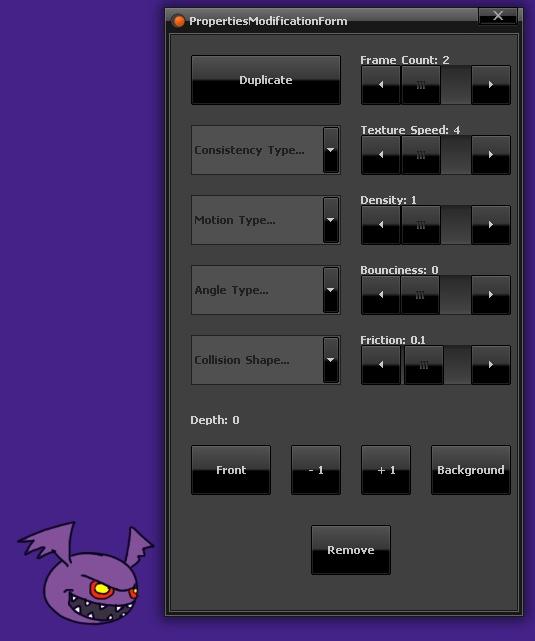
The modification form allows to modify physics properties, texture frame count and speed (for animated entities), depth (you can arrange the "layer" each entity is drawn in, like in Illustrator/Photoshop).
Here frame count is set to 2 because the texture is made of two bats, and texture speed to 4 images per second.
To close the form, you can do the same interaction as to invoke it (press-and-tap/middle click).
Duplicating an entity
Duplicating an entity can be done three different ways:
- PQ: two fingers pan
- S+PQ+M: Enter Modification Form, press "Duplicate" Button, and "move" selected entity
- MK: 'D' + mouse drag
Removing entities
Removing an entity can be done three different ways:
- PQ: three fingers pan
- S+PQ+M: Enter Modification Form, press "Remove" Button, and "move" selected entity
- MK: 'R' + mouse drag
Change the configuration of the editor
Changing the preset entities library or the resolution of the editor can be done through the Meerkat.cfg file.
