EQUIS Subversion Repository
From EQUIS Lab Wiki
We use a subversion repository to maintain lab code. Use of the repository helps enormously in organizing code, but comes with a learning curve. Please do not check in to the repository (or otherwise modify it) until you know what you are doing.
Contents |
Documentation
- Collins-Sussman et al. have released a free online book about Subversion. Chapter 1 on Fundamental Concepts and chapter 4 on Branching and Merging are particularly useful.
Tools
- AnkhSVN: integration with Visual Studio
- TortoiseSVN: integration with the Windows file browser
What NOT to Version Control
Do not place files created by the build process under version control. These include files with extension .cachename, .csproj, .pdb, .obj, .exe and so forth. AnkhSVN is already smart enough not to version such files, but TortoiseSVN is not, and so care is required.
Versioning such files will lead to horrible merge problems, as compiled binaries cannot be merged.
Project Structure
Projects should be laid out in the repository using the following directory structure:
projectName
   trunk
   branches
   tags
The project name should be the name of your project. As a running example, we will use a project used to develop a game called Heart Throb.
Trunk
The trunk directory is the main working directory. If you are the only person working actively on this project, simply store your code here.
Normally your trunk will contain one directory per project in your solution. For example, if HeartThrob Game uses the external projects Physics and GAIM, the trunk will look like:
HeartThrob Game
   trunk
      Physics
      Equis.GAIM
      Equis.HeartThrob
         project files
      HeartThrob Game.sln
Branches
The branches directory is where you should store your code if more than one person is working on the project. Create a subdirectory with your name for your personal version. E.g., if Cheryl and Jason are both working on the project, the directory structure would be:
HeartThrob Game
   trunk
      trunk version
   branches
      cheryl
         Chery's version
      jason
         Jason's version
   tags
Tags
The tags directory stores stable versions of the project. People using the project should typically use the latest release rather than the more volatile trunk. Adding a couple of previous releases to the project would give:
HeartThrob Game
   trunk
      trunk version
   branches
      cheryl
         Chery's version
      jason
         Jason's version
   tags
      release_0.20100401
         release 0.20100401 files
      release_0.20100420
         release 0.20100420 files
For example, in an agile process based on two week sprints, a release could be created at the end of each sprint.
A Note on Release Names
Release names should be composed on a major number and a minor number.
- The major number should be the version number. Initially this should be 0, for internal releases, and increment for each major release.
- The minor number should simply be the date in the form yyyymmdd.
- So a major release 1 issued on March 12, 2010 would have the release name 1.20100312.
Managing Your Project
We first the simple case of one developer, then the more complicated case of multiple developers.
Simple Case: One Developer
- Do your day-to-day work in the trunk directory.
- When you have a stable version that other people can use, make a copy in the tags directory.
- E.g., if you wish to call this release_0.1, your folders will look like:
projectName
   trunk
      your working project files
   tags
      release_0.20100310
         project snapshot for release 0.20100310
General Case: Multiple Developers
- Create the project in the trunk directory
- Create a branch for each developer (e.g., jason and cheryl)
- Developers do their day-to-day work in their own branch
- Your folders will look like:
projectName
   trunk
      your working project files
   branches
      cheryl
         Cheryl's working project files
      jason
         Jason's working project files
   tags
- When a developer (e.g., Jason) completes an incremental change, he merges it back to the trunk.
- Developers need to find a balance as to how often to merge back to trunk - in general, we don't want trunk broken with half-complete modifications, but waiting too long can lead to very difficult merges.
- As above, releases go to the tags directory.
- It's easy to move from one developer to multiple - simply branch the trunk when the second developer enters the project.
Using Other Peoples' Projects
Often, we will want to use other peoples' code in our own projects. For example, if Tad is creating a new multiplayer game called HeartThrob, he may wish to use Cheryl's Janus project.
Simply copy-pasting the Equis.Janus project code into HeartThrob Game is not a good idea:
- It will be hard for Tad to update to the newer versions of Cheryl's code
- We will use more space in the repository than is necessary
- There is a risk that future users of Equis.Janus will copy Tad's version rather than the definitive version from Cheryl.
Getting the First Copy of Another Project
- Do an svn copy of the project into the desired location in the current project. An svn copy does not make physical copies of the files, so does not bloat the repository.
- Typically, you will want to copy the newest release of the project, from the project's tags directory.
- A typical file structure might be
Janus Library
   trunk
      Equis.Janus
         Cheryl's working copy - frequently unstable
   tags
      release_0.2010304
          Cheryl's latest stable version

HeartThrob Game
    trunk
       Equis.Janus
          copy of release_0.20100304
       Equis.HeartThrob
          Tad's working copy
Updating your Copy
When a new release of the project is made, you may want to update your version.
- Delete the old version.
- Copy the new version (as described above).
This will perform the minimum necessary changes to update your copy of the project to the desired version.
For example, if the new file structure is this:
Janus Library
   trunk
      Equis.Janus
         Cheryl's working copy - frequently unstable
   tags
      release_1.20100304
          older stable version
      release_2.20100401
          Cheryl's latest stable version

HeartThrob Game
    trunk
       Equis.Janus
          copy of release_1.20100304
       Equis.HeartThrob
          Tad's working copy
then Tad would want to first delete release_1.20100304 from his copy of Equis.Janus, and then copy release_2.2010401 into his copy of Equis.Janus, giving:
Janus Library
   trunk
      Equis.Janus
         Cheryl's working copy - frequently unstable
   tags
      release_1.20100304
          older stable version
      release_2.20100401
          Cheryl's latest stable version

HeartThrob Game
    trunk
       Equis.Janus
          copy of release_2.2010401
       Equis.HeartThrob
          Tad's working copy
Example Using Visual Studio and AnkhSVN
These examples are based on Visual Studio 2008, XNA Studio 3.1 and AnkhSVN 2.1. The dialogues may differ using other versions of these products.
Before following these examples, be sure to read the sections above.
Creating a Project
Let's assume we wish to create a new project for our HeartBurn Game. We wish to create a HeartBurn Game directory at the root of the code repository. Our initial tree structure will be:
HeartThrob Game
   trunk
      Equis.HeartBurn
         bin
         content
         obj
         Game1.cs
         various other project files
      HeartBurn Game.sln
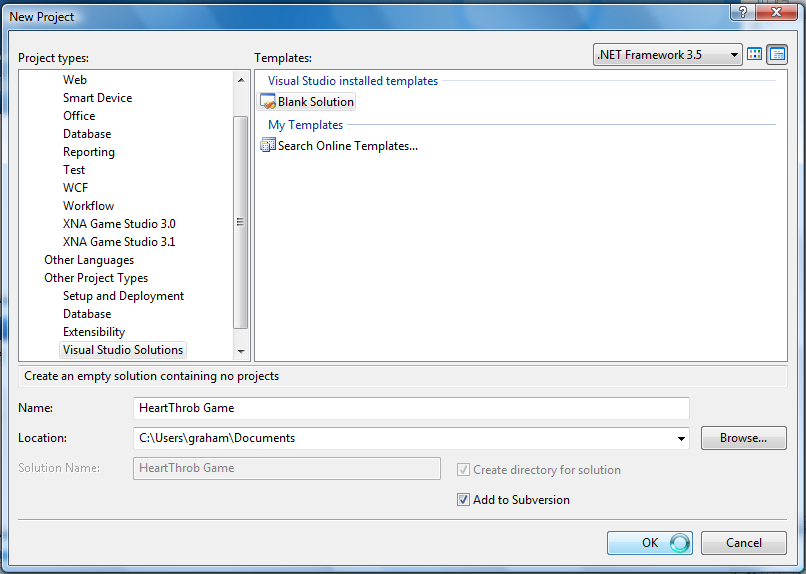
We start by creating a solution for the new project.
- Under "Project types", select "Other Project Types" and "Visual Studio Solutions"
- Under "Templates", use "Blank Solution"
- Put in the name of your project (here, "HeartThrob Game")
- Specify the directory in which you want this project stored (typically your documents directory)
- The "Solution Name" is filled in automatically
- Ensure that "Create directory for solution" and "Add to Subversion" are checked.
The dialogue should look like this:
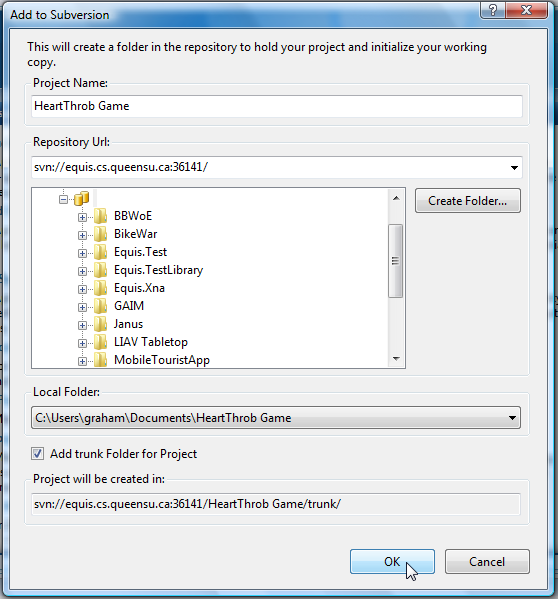
You will be asked to specify how to add this project to subversion.
- The repository URL is as shown below. (If you have used the code repository before, you will be able to select from the drop-down list; otherwise, type it in.)
- You wish to create the project at the root of the repository. Click on the "double cylinder" symbol in the repository browser window.
- Click the "Add trunk Folder for Project" option.
- Your project path should be filled in as shown here:
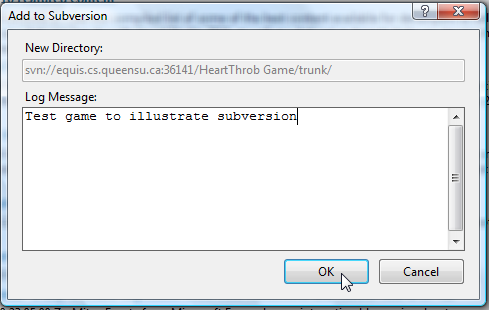
Fill in the "Add to Subversion" dialogue. Be sure to put in a meaningful log message:
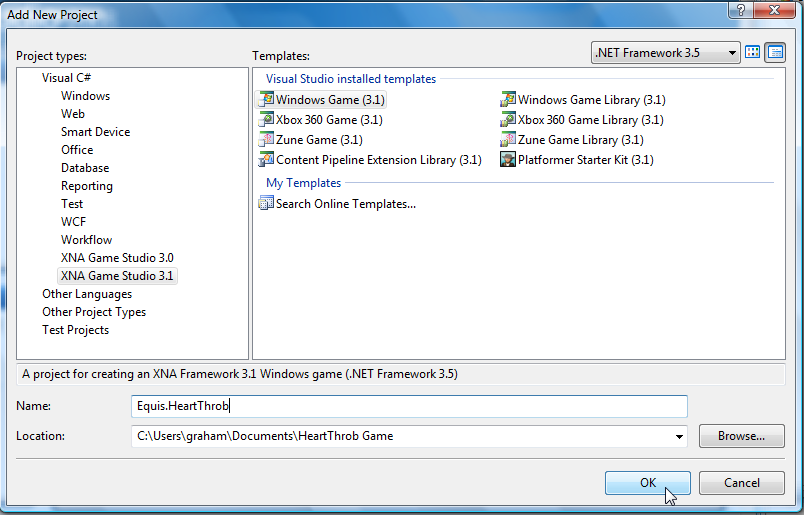
You will be taken to the standard Visual Studio window. Your solution is empty, so you will need to add a project. This should be named using our usual "Equis.ProjectName" format. Add a project by right clicking the name of your solution in the Solution Explorer, and selecting Add->New Project.
In the resulting dialogue, specify the kind of project (e.g., Windows Game (3.1)), and fill in the project name (e.g., "Equis.HeartThrob").
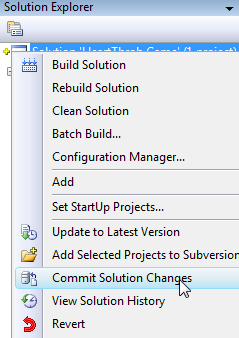
Note that in the solution explorer, some files have a blue "+" symbol. This indicates that the files have been added to the repository, but not yet committed. To commit, right-click the solution name in the Solution Explorer, and select "Commit Solution Changes". (If you want to commit more selectively, e.g., just one project, right-click just that project rather than the complete solution.)
Fill in a log message (always do this!) and confirm the commit:
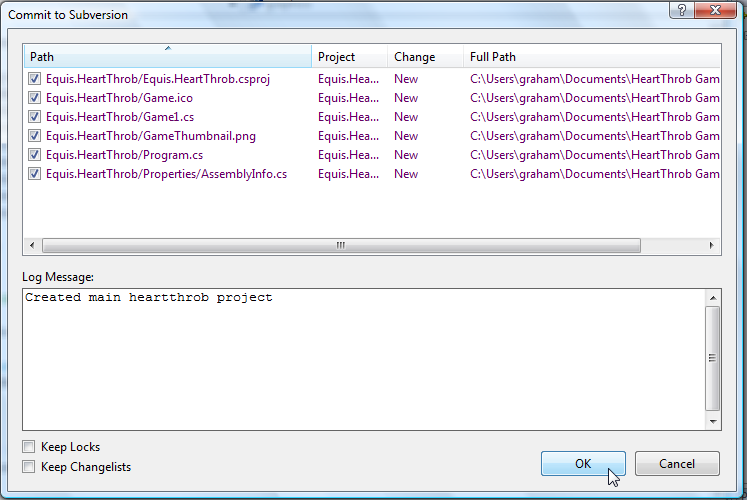
The solution explorer now shows the project's contents as committed (via a "tick" symbol).
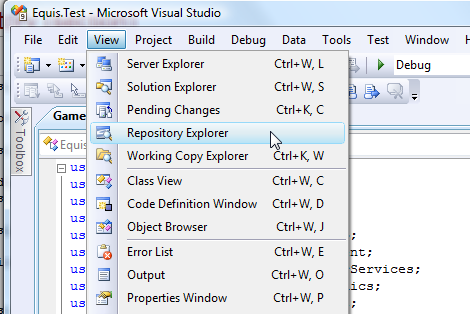
The Repository Explorer
The repository explorer allows you to examine and modify the repository. To access the repository explorer, select it from Visual Studio's View menu:
The repository explorer shows us the contents of the entire repository, and provides toolbar commands to manipulate it:
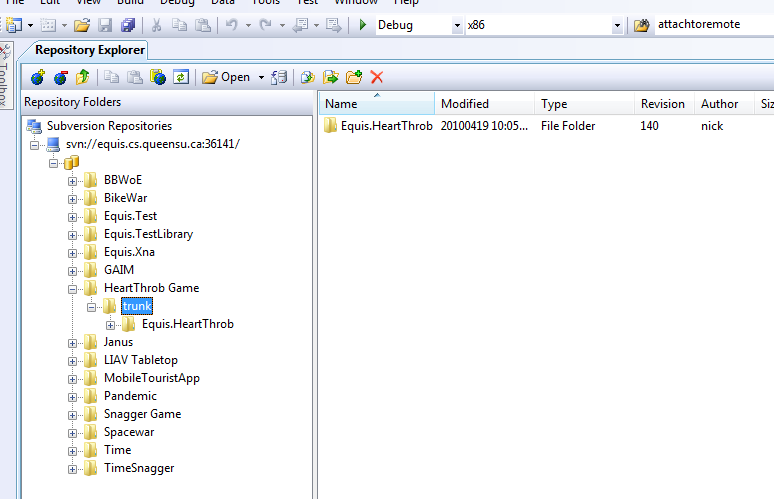
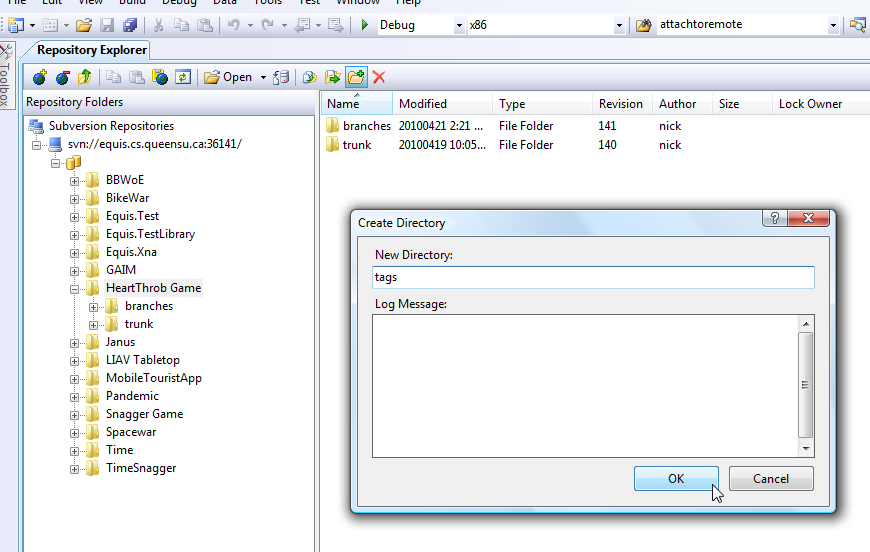
For example, we can use the "create new directory" tool to create branches and tags directories:
Using another Project
Imagine that our HeartThrob game requires us to use a Unicycle Library also available within our code repository.
We therefore wish to copy the appropriate release of the Unicycle Library into our project.
We will do this using the Repository Explorer; see instructions above for how to open the Repository Explorer.
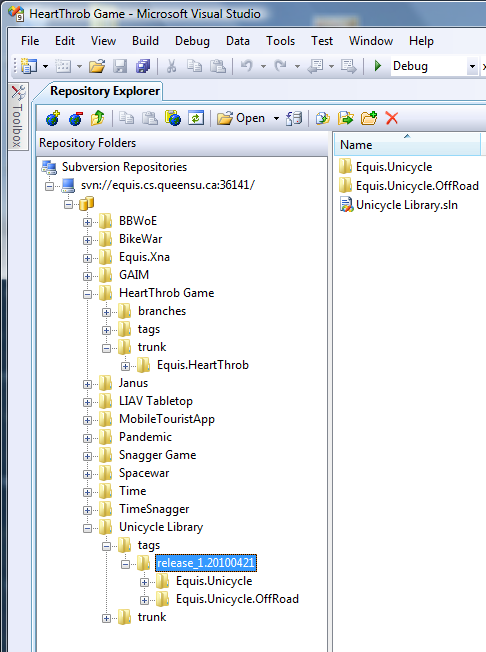
From the Repository Explorer, we can see that the Unicycle Library has a single release, and contains two projects: "Equis.Unicycle" and "Equis.Unicycle.Offroad". We therefore want to copy both projects into the trunk of Equis.HeartThrob.
Repeat the following for each project to be copied. (In theory, we should be able to copy them all at once, but at the time of writing, this seems to crash AnkhSVN and Visual Studio along with it.)
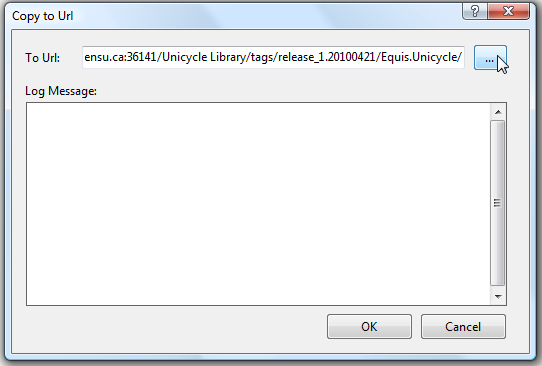
- In the Repository Explorer, select one of the projects of interest, and click the "Copy To" button.
- In the dialogue that appears, click the browse button:
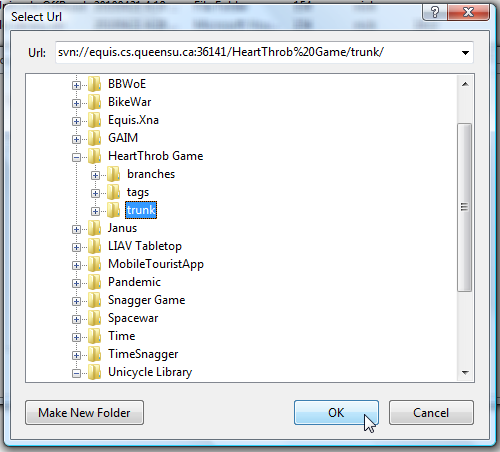
- Browse to the trunk of your project and click "OK":
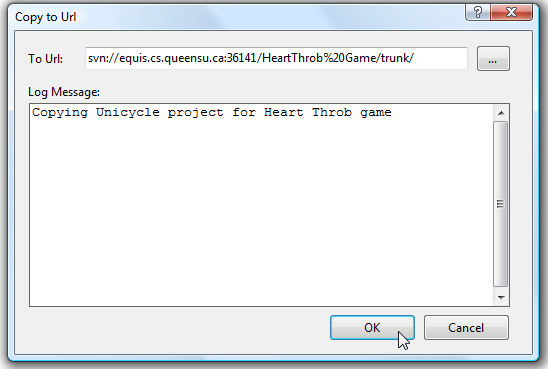
- Fill in a log message and click ok. The project is now copied.
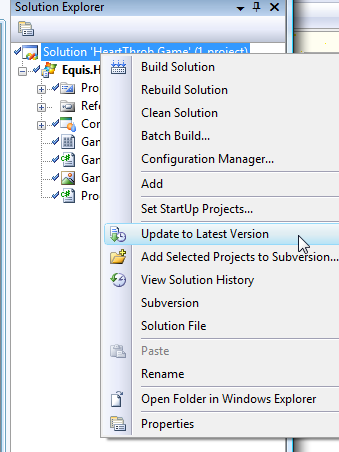
These changes are applied to the repository. Once all projects are copied, you will need to update your working copy:
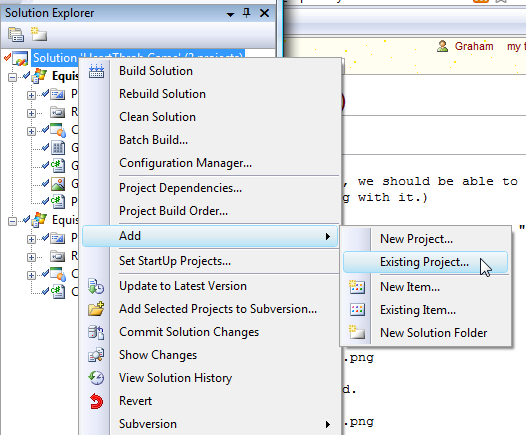
And finally you need to add the new projects to your solution. Right-click on the solution and select "Add->Existing Project", and browse to the project's location in your working copy.
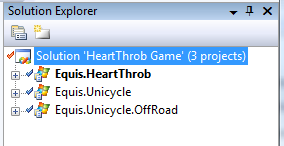
The new projects should now appear in your Solution Explorer:
Creating a Release
Here we will create a release of our unicycle library.
When creating a release, first ensure that your project is fully checked in.
Right-click your solution in the Solution Explorer and select "Subversion|Branch Solution":
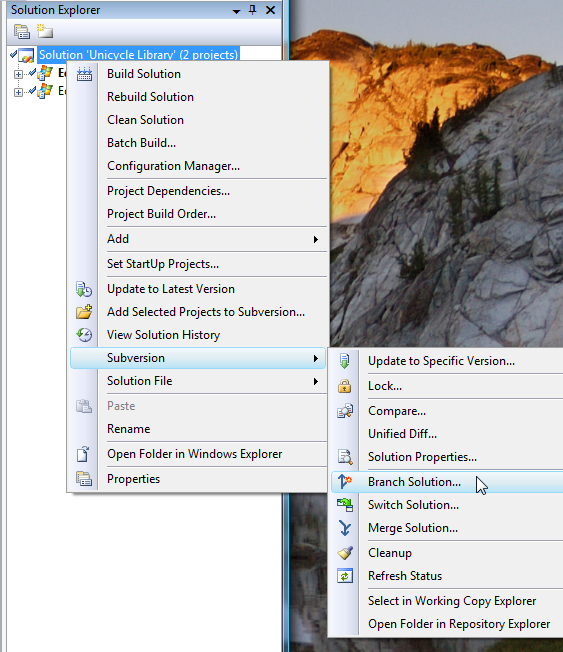
In the resulting dialogue, fill in the location of the release, within your tags hierarchy. Note that the dialogue will fill in branches in the path; delete this and fill in tags in its place.
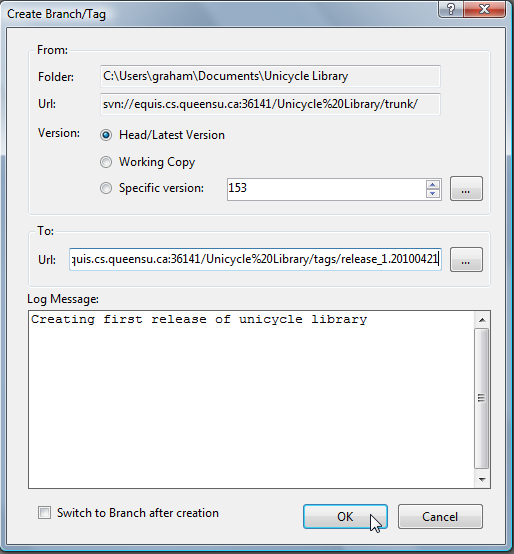
That's it - your release has been created.
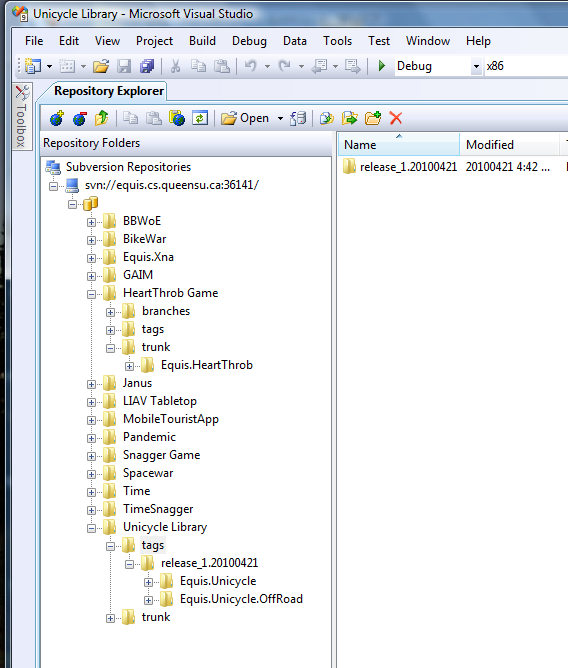
To ensure everything worked, you can open the Repository Explorer:
Creating a Personal Version
The procedure is the same as creating a release (see above), except that you copy to the branches directory.
I suggest naming the branch after your first name.
Merging a Personal Version Back to Trunk
...to come...
