Liberi Developer Guide: Art
From EQUIS Lab Wiki
This page documents a set of principals and guidelines for creating new art assets for Liberi or editing existing ones. It is more important that art assets are consistent than it is that they are beautiful. By using similar colors, line weights, and conventions, any artist should be able to mimic the visual style of Liberi and create new content that does not look out of place or weird.
Contents |
Tools
![]()
The majority of art assets in Liberi were created using Flash CC. Flash was chosen as it is a quick and easy to use tool for creating Vector Graphics. By authoring assets as vector graphics, we can reliably export our sprites to look high quality at any resolution (though we only use one set of exports now for all platforms regardless of DPI). Other alternatives to Flash for creating vector graphics include Adobe Illustrator and Inkscape(free).
Previously, assets were authored in Photoshop. In the case of either program, the artist at the time used their own personal license and the lab did not actually own a license itself. It will always be the case the a new artist may have a different desired working environment, but as long as they have the software and adhere to visual style conventions, the artistic tool can be left up to the artist to choose.
Lines
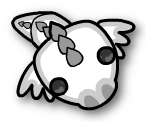
Line art is an important part of Liberi's visual style. Sprites in the game typically use very pronounced black lines
Sprites typically stick to just 2 Line Weights:


There are times where other line weights are used, especially in the GUI, but as a rule of thumb, if the line "touches" the background it will use the 3.0 thickness, and the line is entirely within a shape using 3.0 lines, it should be 1.5.
Colored Sprites
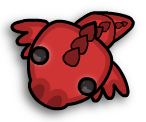
When a sprite changes color dynamically (as is the case with player Avatars in each minigame) the sprite is created in gray-scale. The Color property of any SpriteRenderer component multiplies with the color of the sprite in the sprite's shader. Where the sprite has white color values, it will have color values exactly equal to the color selected in the SpriteRenderer component. Where there are darker gray values, there will be darker shades of the selected color. Black pixels will remain completely black.
The same idea is often used for particle effects as well. If a specific color of particle is need for an effect, but may be reused elsewhere in a different color later on, a white/gray-scale particle can be created and colored using the ParticleSystem instead of baking the color into the sprite itself.
Export Format
Unity handles a lot of native file formats, but it does not parse images out of Flash's native FLA format. As such, sheets of sprites are put together inside of Flash, and the entire sheet is exported as a PNG file for use in Unity. PNGs are sliced into multiple sprites using Unity's Sprite Slicer, found in the import settings on the inspector when an image file is selected in the editor.
When art decisions were being made Unity had only just launched their 2D Sprite solution and the sprite packer was still a development feature, but this has since changed. Future work may include using individual PNGs for each sprite and letting the texture packer handle packing textures instead of having to layout sprites ourselves in sprite sheets.
"3Dness"
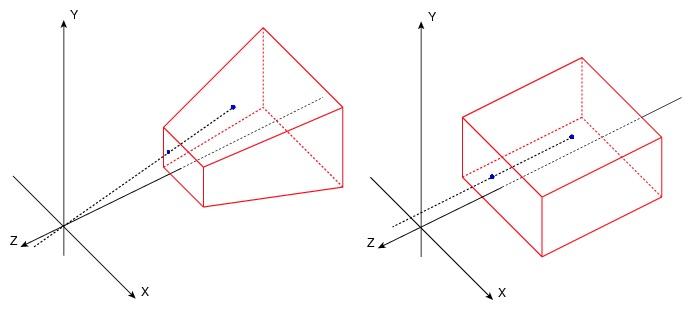
Liberi uses a perspective view as if it were a 3D game, instead of an orthographic view. This means that there is distortion based on what distance a sprite is from the main camera. Liberi also makes use of Unity 2D's sprite sorting capabilities. Because of this, you can get into weird situations, for example: object A has a closer Z Distance to the main camera than object B, but object A has lower sort order (or is on a lower sorting layer) than object B. Object A renders behind object B even though perspectively it looks as if object A is closer!
It's important to pay attention to what ordering things are being put in. Some games may want to use a mix of Z sorting and Sprite sorting to create a parallax effect for the background. Others may just stick to sprite sorting and keep the game looking flat and 2D.
Animation
All animation for Liberi is done inside of Unity. Hierarchies of sprites are put together and an Animator component is added to the root object. The positions, rotations, and scales of child objects are set at key frames to create the desired animation. Several animations are put into the Animator state machine with control variables governing state transitions. Control Variables are set from a View script to control animation at runtime.
Here are several common "gotchas" to look out for when animating in Unity:
- Siblings must have different names, or they will fail to animate correctly. Rather than have 2 child sprites called "hand", name one of them "left_hand" and the other "right_hand".
- Animating the root object overrides transform changes done in Update(). This usually means you want to avoid animating the root object, because for example on a player avatar, animating the root position would prevent the player from moving.
- Animations loop by default. Find the newly create ".anim" file and untick the "Loop Time" property in the inspector if you want your animation to fire once.
- Renaming parts of the hierarchy will break your animations. This is super annoying and there are hacks/assets out there to deal with it, but it's best if you just correctly name all of your sprites before you start animating them.
